
How to fill the student information form
Student Profile Form-
To take an important step towards accreditation we have introduced a student profile form in the LMS. All the information provided will be kept private and secured. It will not be shared with anyone else as per the University’s privacy policy.
The students who are NOT enrolled in any certificate program can just fill out the personal information section of the profile. Professional information section is optional for them.

The students who are enrolled in any Program, such as – Certificate Program in Hindu Studies (CPHS), Certificate program in Sanskrit Proficiency (CPSP), Micro certificate in Spoken Samskritam (MCSS), Master of Arts in Hindu Studies, (M.A in Hindu Studies), Doctor of Philosophy In Hindu studies (PhD) – must fill out the Professional information section of the profile form. That is mandatory.
Our programs mentioned above have a prerequisite of certain level of prior education and/or experience. Therefore, we request uploading a degree certificate and/or transcript along with the resume. Please submit an identity proof like license or passport for the purpose of establishing identity.
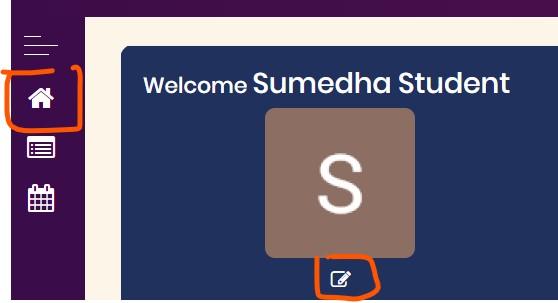
To go to the LMS dashboard, all the students should click on the dashboard icon after saving the profile information and then they will be able to access the courses. (Please refer to the image below.)

To edit the information, student can visit their profile and click on edit option. (Refer the image below.)
- The students who are NOT enrolled in any of the Programs offered by Hindu University of America
- Go to student profile form.
- Fill out only Personal Information.
- Click Save Changes.
- Click on the Dashboard Icon on the left side of the screen. (Refer to the image below.)
- The students who ARE enrolled in one of the above mentioned programs (CPHS, CPSP, MCSS, MA, PhD) –
1) Go to the student profile form
2) Fill out personal information.
3) Click Save Changes.
4) Click on the Professional information.
5) Fill out the professional information.
6) Click Save.
7) Click on the Dashboard Icon on the left side of the screen. (Refer to the image below.)